Do you have a Windows 11 computer and you do not want to update for reasons best known to you and you are wondering how on Earth you can go about it? Well, this article is for you as we have provided all you need on how to stop Windows 11 updates whether temporarily or permanently.
Windows 11, which Microsoft introduced a few years ago, offers a serene and creative environment where you may follow your passions through a novel experience. Despite Microsoft’s assertion that you must keep Windows 11 updated with the most recent features and security fixes, you can block Windows updates for reasons best known to you.
It should be noted that often stopping Windows 11 updates won’t result in data loss. However, if you accidentally lose data, stop using your disk right once and find a means to recover your lost data.
Microsoft provide updates for Windows 11 regularly that include new features, security patches, etc. The most recent Windows 11 updates will often be installed automatically on your computer [if not turned off or stopped from installing automatically].
You can check out the 5 methods listed below on how to stop Windows 11 updates if you choose not to update Windows 11 for a variety of reasons and stick with the most recent update version.
How to Stop Windows 11 Updates
Microsoft has already stated that Windows 10 users won’t be required to install the Windows 11 upgrade when it first launches. You must manually navigate to “Settings >> Update & Security >> Windows Update” if you wish to check for Windows 11 updates to see if your device meet the minimum requirements to upgrade to the Windows 11.
To make room for Windows 11, some users who have enabled Windows automatic updates desire to turn off this function. As a result, we provide you with practical ways to stop Windows 11 updates and how to stop Windows 11 update notifications.
Follow the steps below by selecting any of the methods that work best for you:
Disable Windows Update Services in Windows 11
Disabling Windows update services is one of the best ways to stop Windows 11 updates. The procedures are simple enough for a novice. Follow the steps below:
- To open the Run window, use “Windows + R”.
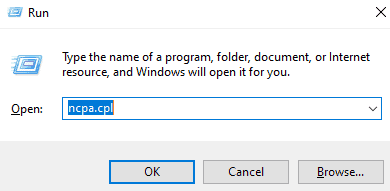
- Enter services.msc into the “Services Window” and press the “Enter” key.
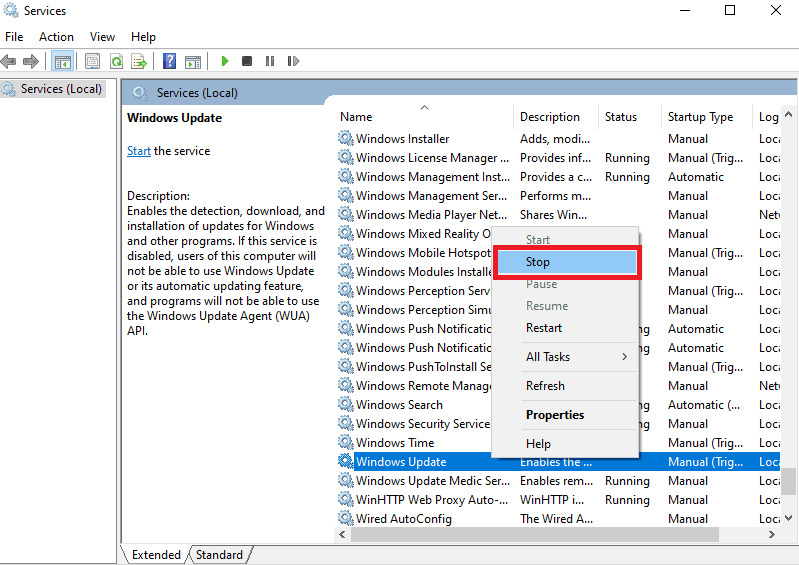
- Go to “Services” >> Rign-click on “Windows Update” and choose “Stop” from the pop.
- By clicking on the “General” tab, change the “Startup Type” to “Disabled”.
That’s it! Now, you have stopped Windows 11 automatic updates successfully.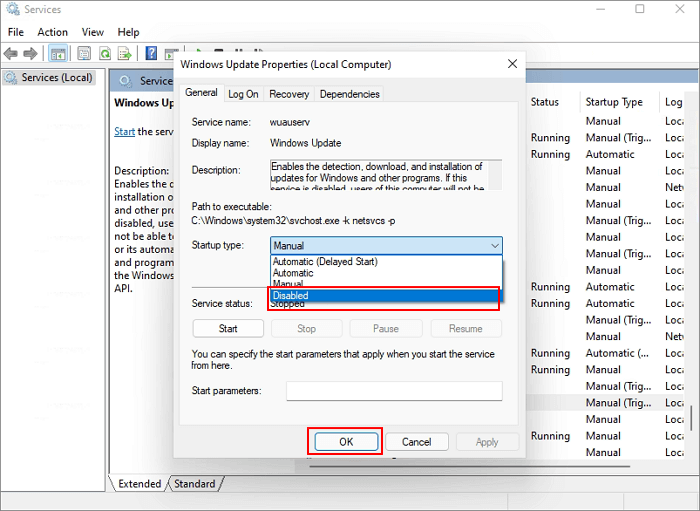
Stop Windows 11 updates with Group Policy Editor
You can deactivate or pause the Windows 11 update using Group Policy Editor if you don’t mind delaying the installation of Windows 11. Follow the steps below:
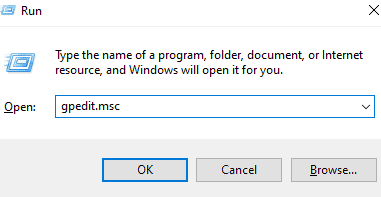
- Enter Window + R.
- To open the Group Policy Editor, type gpedit.msc.
- Navigate to the “Local Computer Policy > Computer Configuration > Administrative Templates > Windows Components > Windows Update > Windows Update for Business” area.
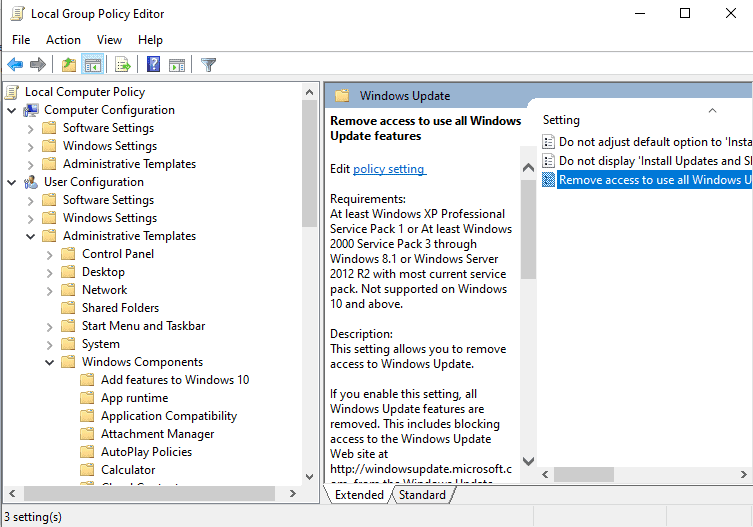
- Tap on “Select the target feature update version” by double-clicking it.
- Set the policy to “Enabled”, type 21H1 into the field, and then exit the Group Policy Editor.
That’s it!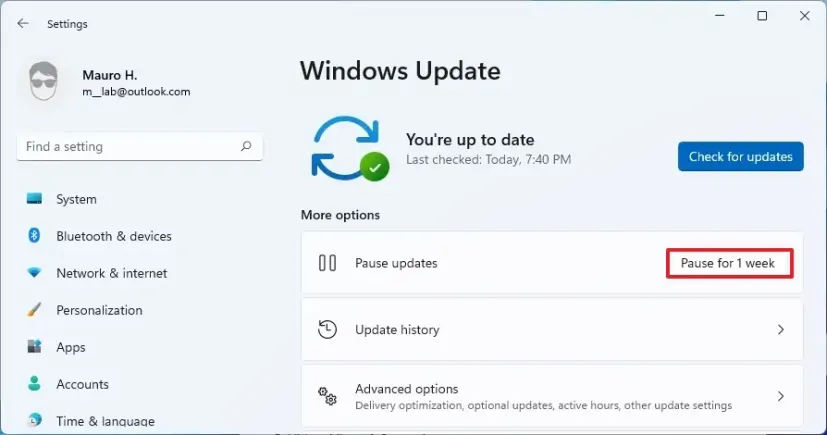
Pause Windows 11 Updates Weekly
Another method for disabling and preventing Windows 11 updates is to pause the update every week. Pausing Windows 11 updates prevent the system from updating on its own for 7 days. It may be confusing right now, but after reading the steps below, you will understand:
- Go to “Settings” from the Start menu by right-clicking the Windows symbol.
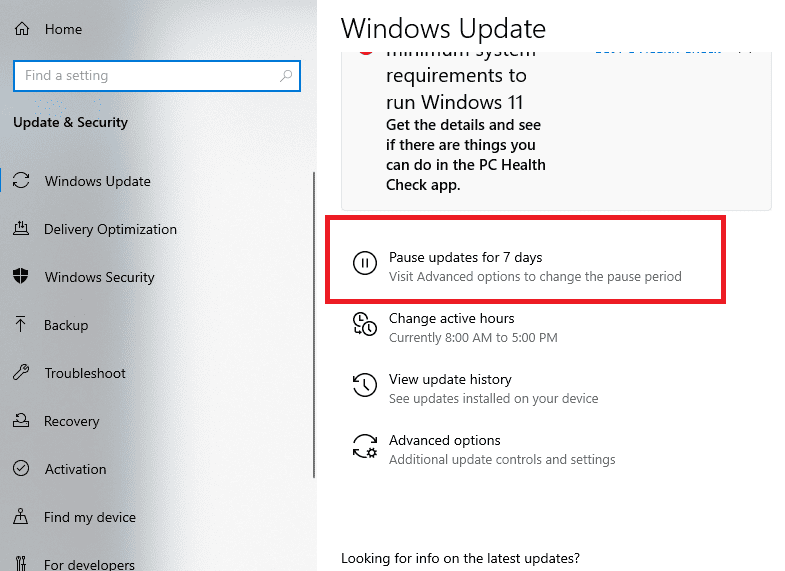
- Once the settings screen loads, you will see several options from which to choose, select ‘Update & Security’ and then click the “Pause updates for 7 days” button.
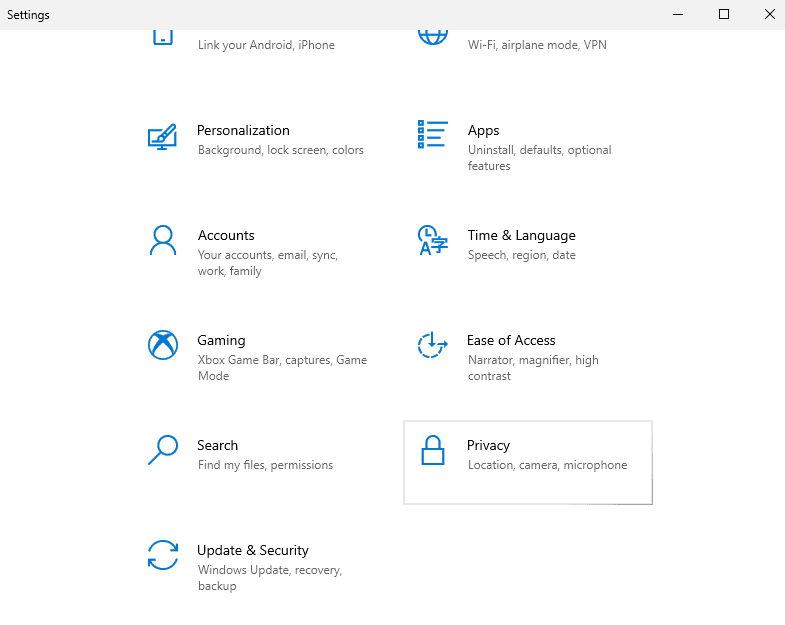
- When the ‘Update & Security’ feature appears, you will see the option ‘Windows Update.’
- Go to that option, then select ‘Pause updates for 7 more days’. This will suspend the automatic update, allowing you to successfully stop Windows 11 from updating.
That’s it! Now, your Windows 11 updates will stop.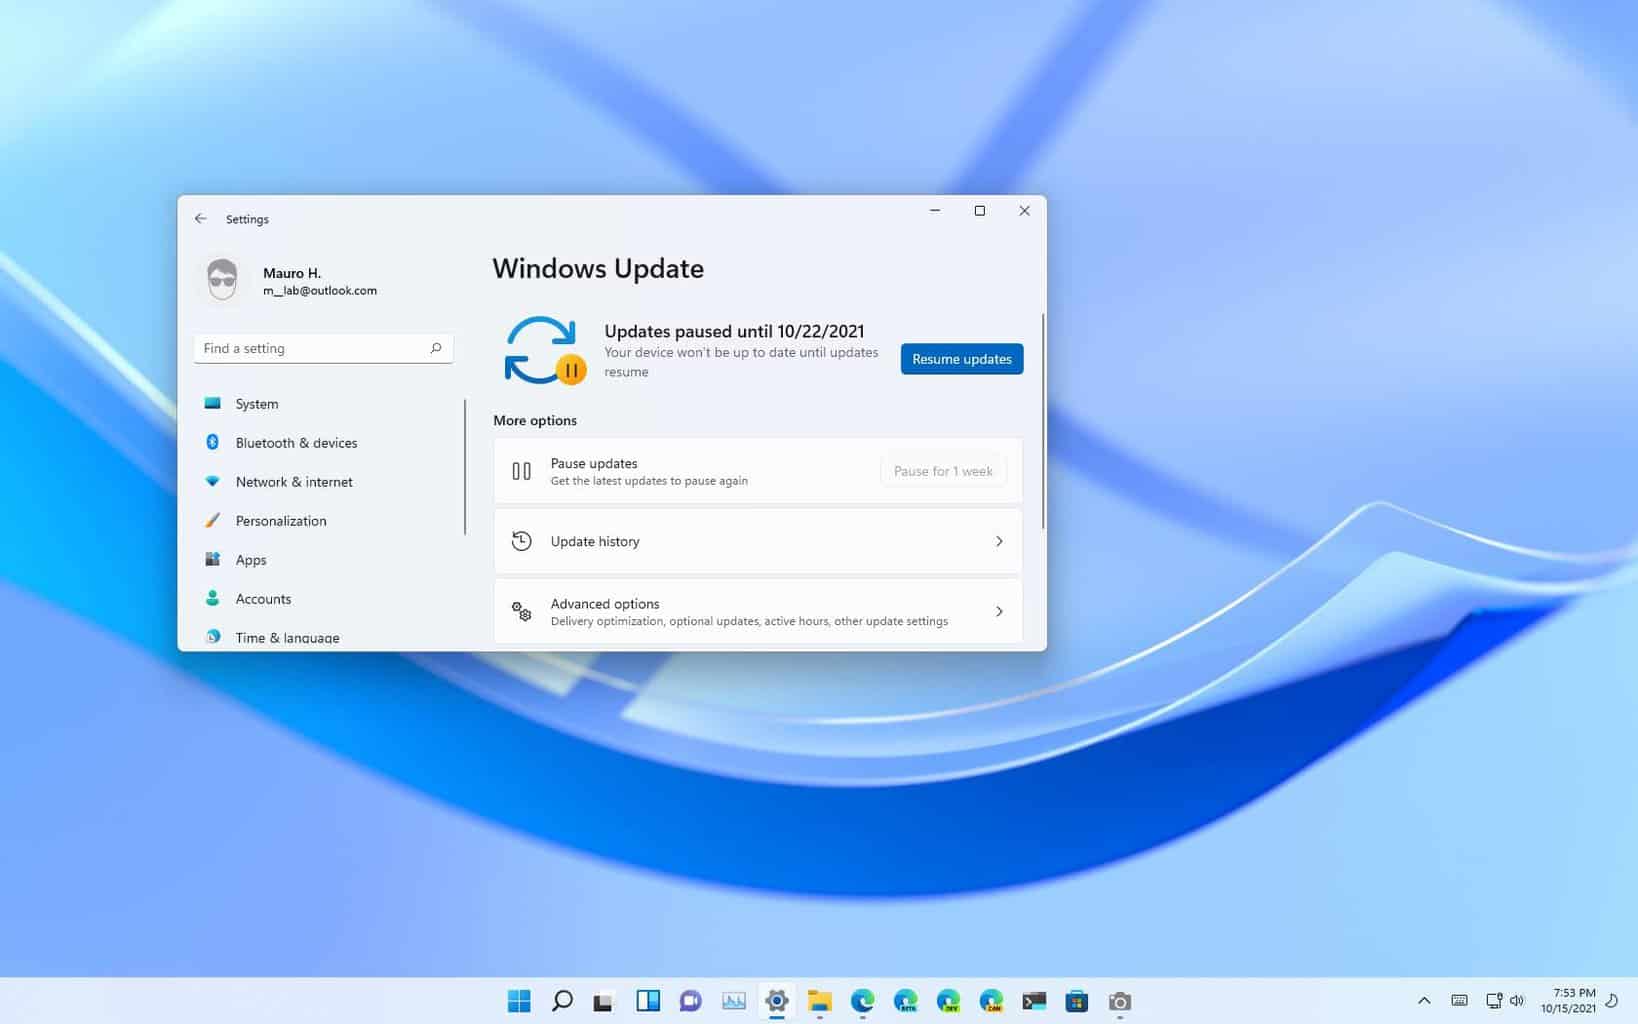
Stop Windows 11 updates with Registry Editor
Another method for disabling automatic update services is to utilize Registry Editor. Before we go any further, we must warn you that this procedure is extremely dangerous to utilize. Because this method has the potential to destroy your system, it is recommended that you keep a backup of everything. With that said, follow the instructions below to proceed:
- To begin, first put ‘Registry Editor’ into the start menu’s search field and then choose ‘Run as Administrator.
- After launching ‘Registry Editor,’ copy and paste the given path into the path following ‘Computers,’ or type the path below: ‘HKEY_LOCAL_MACHINE\SOFTWARE\Policies\Microsoft\Windows’
- Now, search for ‘Windows’ in the sidebar.
- Once you’ve found it, right-click on it and select ‘New.’
- You must then select the option ‘Key.’
- After that, you can change the key’s name to ‘WindowsUpdate.’ You must now add another key to the newly formed key.
- Set the key name for the ‘WindowsUpdate’ key to ‘AU’.
- After that, right-click on ‘AU’ and then choose ‘DWORD (32-bit)’ value and call it ‘NoAutoUpdate.’
- To enable the mode, restart your computer.
- The final step in this procedure is to select ‘NoAutoUpdate.’
- Select ‘Modify’ from the menu that appears, and then modify the ‘Value Data’ to 1 from the default value of 0.
This can also be done by double-clicking ‘NoAutoUpdate’ and changing the default value of 0 to 1. After that, reboot your computer to enable the mode you selected.
Stop Windows 11 Updates with Third-party Tool
The Automatic Updates can also be turned off or on by using a third-party tool. Whichever way the user prefers to employ to turn off the computerized updating service is up to them. If you choose to use a third-party tool, you can ignore all the methods we previously covered. “Windows Update Blocker” is the tool that works best for this.
You can use the tool anytime, anyplace, and all you need to carry are the program files on an external device. You are also saved from the drawn-out installation procedure. With the click of a single button, the Update process is entirely under your control. Follow the steps below to disable Windows Update:
- To begin, you must download ‘Windows Update Blocker.’
- You must extract it after downloading it completely.
- The extraction could take place in the location of your choice.
- After that, launch the tool.
- Turn off the Services.
- Once you launch the tool, a service status icon will appear, informing you of your device’s current updated service status.
- If you want to disable the Automatic Update service, you must select the ‘Disable Updates’ option.
- Once you do this, the cross-status icon will appear.
- Finally, click on the ‘Apply Now’ button to save the changes to your system.
This is all about how to stop Windows 11 Updates.
If Windows 11 hasn’t wowed you, this article should do the trick. There have been several approaches described for stopping Windows 10 updates. By presenting a variety of strategies for entirely disabling computerized update services, the post has covered a wide range of knowledge bases. Windows updates, however, could occasionally be pointless. Be careful of what you install and download onto your computer.