
If the antimalware service executable high memory program is consuming more CPU processing power thereby reducing the performance and efficiency of your Windows computer here is everything that you need to know and possible ways on how to stop antimalware service executable high CPU problem.
Antimalware service on Windows is an underground program and it’s supposed not to consume up to 50% of your computer CPU process power otherwise it will start to affect other programs and cause the computer to slow in the data processing.
Table of Contents
What is Antimalware Service Executable High Memory?
Antimalware service executable is a Windows program that is running in the background of your computer to protect your computer from virus and malware. The service executable program runs continuously to make sure that all threat from the internet or executable files such as software, flash drives, USB, etc are are free from dangerous programs that can affect your computer.
However, the antimalware service executable high memory could be unusual or abnormal since the Windows inbuilt antimalware program has a dedicated CPU to run smoothly without affecting other programs.
The Windows Defender background security has since replaced antivirus on most Windows computer. To keep both the Windows PC and Windows defender underground program run smoothly neither of the sections should executable on more high CPU without a reason.
So, if you are considering the antimalware service executable functionality abnormal such as causing overheating on your computer it may be high time you turn to learn how to fix the antimalware service executable high memory.
Note: If you turned off Windows Defender you would likely not see the antimalware executable service taking such much high disc space or memory on your Windows.
How to Fix Antimalware Service Executable High Memory
There are few ways to fix the antimalware service executable high memory or CPU consumption on Windows. Each of the approaches is a step toward fixing the high CPU risk due to unnecessary CPU usage by the Windows Defender background program.
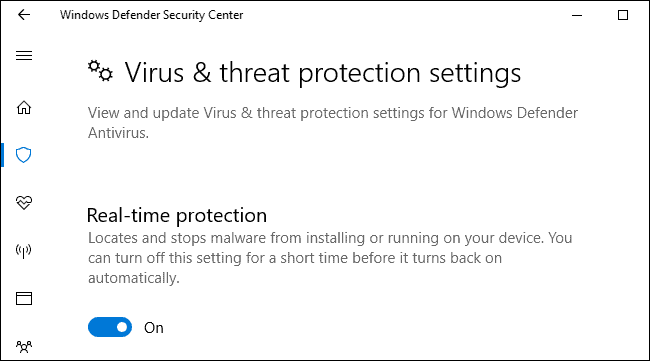
Disable Windows Real-Time Protection
The first recommended steps toward fixing high CPU in antimalware service executable on Windows is to turn off or disable the Windows real-time protection. Since the Windows 10 real-time protection is connected to the antimalware executable service, it’ll be wise to disable it to see if it fixes the high memory or CPU.
What it simply means to disable real-time protection in Windows to save antimalware service executable from eating up your computer CPU is that the executable file MsMPEng.exe will not be launched automatically whenever you switch on your Windows PC.
Therefore, to disable real-time protection on Windows 10 to stop the antimalware service background program from running automatically follow the steps below.
- Press and hold “Win + I” to open the Windows settings. In Windows 8 click on “Change PC Settings” on the bottom right when you hold “Win + I” together.
- In the Windows Settings, click on “Update & Security” and click on “Windows Defender.” On Windows go to your Control Panel >> System and Security >> Action Center >> Windows Defender.
- Toggle on the “Windows real-time protection” button to disable it.
Now, close all opened tabs and save all open files. After that, restart the Windows PC and check if the antimalware service executable wakes up and still take high CPU on your device.
Change Windows Defender Scheduling
If disabling Windows Defender real-time protection didn’t work to solve the antimalware service executable high memory you should consider playing around the Windows Defender scheduling. This helps you instead of making the Windows Defender and its executable files active all dau you can schedule with Windows Defender and let it carry out a scheduled routing check.
When setting up Windows Defender task scheduling you should set it to the time that you would be off the PC so that even if the routing check of PC scanning is consuming 50% of your computer CPU it will have little or no effect on your work ethic.
- Press “Win +S” on your keyboard simultaneously to open the search box on your Windows 10.
- Search and open “Task Scheduler” from the search result with the clock icon or “Schedule task” on Windows 8.
- There are a few options available to play around with. Now, expand the arrays as followers.
- Task scheduler library >> Microsoft >> Windows >> Windows Defender.
- In the “Scheduler task, there are four Windows Defender” options that are available with each option status showing “Ready.”
- Now, right-click on each of the options select “Disable” from the popup and click on the “Apply” button.
You need to close the task scheduler and other open files and restart your PC. This should solve the antimalware service executable high disc or memory usage.
Disable Windows Defender
It’s not advisable to run a PC without an antivirus protecting you from unwanted codes as well as malware and viruses. So, if you are disabling the Windows Defender in your Windows OS be sure to have a third-party antivirus that will stand as a replacement.
Disabling Windows Defender in Windows 10 is a bit technical as there is no direct way to turn off the feature in your Windows 10 but that doesn’t mean it cannot be achieved.
Therefore, we will walk you through how to tweak Windows 10 Registry Editor to disable the Windows Defender permanently with a move to fix antimalware service executable high memory problem.
Note: We recommend that you should create a backup for your Registry Editor so that can restore the back up if things go wrong. Meanwhile, for a technical approach on how to create a Windows 10 Registry Editor backup follow the guide here.
Now, proceed with the guide below to learn to disable Windows Defender in Registry Editor.
- Press and hold “Win +R” to open the Windows run dialog box.
- Type “Regedit” onto the box and click on the “Enter” button. You will be prompted to run the registry editor as an admin. Don’t hesitate to grant access.
- On the left pane and navigate to HKEY_LOCAL_MACHINE >> SOFTWARE >> Policies >> Microsoft >> Windows Defender.
- On the right pane where you find DisableAntiSpyware. Double-click on the edit key to edit the value.
- At this juncture, a new window will popup delete “Value data” number and input zero “0”, make sure the base is set to “Hexadecimal” and click “DisableAntiSpyware. “
That is all you have to do. But, to see changes, exit the Windows Registry Editor and restart your PC. Now, the Windows Defender running the antimalware service executable will be disabled permanently.
And once it’s disabled and the antimalware service background program is no longer run either on schedule or automatically, the antimalware service executable high CPU will stop from consuming your Windows CPU that causes the device to crawl.
Add Antimalware Service Executable to Windows Defender’s Exclusion List
You don’t want to disable Windows Defender and use a third-party antivirus program but you want to fix antimalware service executable high memory in your Windows 10 then add the program to your Windows Defender exclusion list.
So, with this, you won’t need to bother about high CPU or the Windows Defender executing the antimalware service executable program.
- Press “Win + I” to open your Windows 10 settings.
- Now, select “Update & Security” in the settings interface.
- Click on “Windows Defender” to the left. Under “Exclusion” click on “Add an Exclusion.”
- A new window will open, navigate to “Processes” and click on Exclude a .exe, .com or .scr process.
- Add the antimalware service executable file “MsMpEng.exe” and click on “OK”
What this does is to exclude the antimalware service executable file from running when your Windows startup. Neither would you see high CPU or PC crawling? To see the effect, restart your PC and check startup programs you will see that the MsMpEng.exe has been excluded from your startup programs.

